
Most dogs don’t figure out an automatic ball launcher on their own. The machine is loud, unfamiliar, and nothing like the human arm they’ve been chasing balls from their whole life. The good news: with the right approach, most dogs grasp the basics within 3–7 sessions and reach reliable independent play within one to two weeks.
This guide walks you through every stage — How to Train Your Dog to Use an Automatic Ball Launcher – from first introduction to fully autonomous fetch — including how to handle the three most common training roadblocks.
What this guide covers:
- Phase 1: Getting comfortable with the machine
- Phase 2: Building the fetch association
- Phase 3: Transitioning to independent play
- Handling common problems
- FAQ
Phase 1: Getting Comfortable with the Machine
The single most common training mistake is turning the launcher on too soon. A dog that gets startled on day one will take significantly longer to train than one that was introduced gradually. Spend time on this phase — it pays off later.
Step 1 — Let Your Dog Explore the Machine While It’s Off
Place the launcher in a familiar area where your dog spends time. Leave it powered off. Do nothing else.
Let your dog approach at their own pace. Most will sniff it within a few minutes. Some will ignore it entirely for the first day. Both are normal — do not force interaction.
To build a positive association, scatter a few high-value treats around the base of the machine. Place them in a line leading up to the launcher so your dog has to get progressively closer to collect them. Replenish any treats that are eaten or go stale.
How long:1–2 days, or until your dog approaches the machine without hesitation.
What you’re achieving:Your dog learns that the launcher is a neutral object in their environment, not a threat. This foundation makes every subsequent step faster.
Step 2 — Introduce the Sound Before the First Launch
This step is skipped by most owners and causes most fear-related setbacks. Do not skip it.
With your dog in the room, turn the launcher on but do not load any balls. Let your dog hear the motor hum and the pre-launch beep without anything being fired. Stay calm yourself — dogs read your body language closely.
When your dog remains calm or shows curiosity rather than fear, reward with a treat and quiet praise. If your dog flinches or backs away, do not comfort excessively (this reinforces the fear response). Simply wait, stay calm, and let them re-approach at their own pace.
Run this for 5–10 minutes. Repeat once or twice on the same day if your dog is responding well.
What you’re achieving:Your dog learns that the motor sound and beep are not threats — and that calm behavior near the machine earns rewards.
Phase 2: Building the Fetch Association
Once your dog is comfortable around the powered-on machine, you can introduce actual launches. This phase is about connecting the launcher to the fetch game your dog already knows.
Step 3 — First Launch: Position Your Dog to the Side, Not in Front
This is a safety rule that also becomes a permanent habit. Your dog should always be positioned to the side of the launcher when a ball is fired — never directly in front of the launch opening.
Load one ball. Stand with your dog at your side, positioned to the side of the machine. Let the ball launch. For most dogs, the chase instinct activates immediately and they go for the ball without any encouragement needed.
When your dog retrieves the ball, manually take it and reload the machine yourself. Repeat 5–10 times in this first session.
What you’re achieving: Your dog connects the launcher with the fetch game. The machine becomes exciting rather than threatening. You are also beginning to establish the side-position habit from the very first session.
Session length: Keep this first session to 10–15 minutes. End while your dog is still engaged and enthusiastic — never wait until they lose interest.
Step 4 — Teach the Drop-In Habit
This is the skill that enables self-play. Without it, your dog will retrieve the ball and bring it back to you — not to the machine. Teaching the drop-in takes patience but is straightforward with consistent technique.
The method:
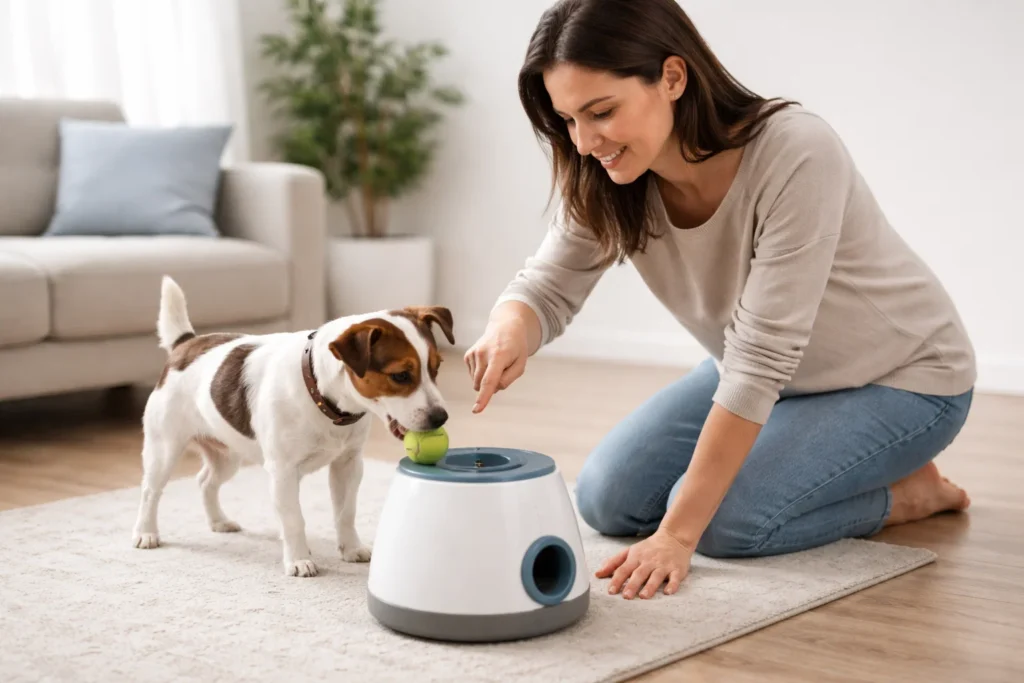
1. When your dog returns with the ball, hold a high-value treat directly above the ball drop opening of the launcher.
2. Say “drop it” clearly and wait.
3. Your dog will drop the ball to get the treat. If the ball lands in or near the opening, immediately reward with the treat and enthusiastic praise.
4. In early sessions, you can help by catching the ball as it drops and placing it in the hopper while still rewarding your dog — the goal is for your dog to understand that dropping near the machine is what earns the reward.
5. As your dog improves, require the ball to actually land in the hopper before rewarding. Gradually reduce treat frequency as the ball launching itself becomes the reward.
What you’re achieving: Your dog learns a specific sequence: retrieve → return to machine → drop ball into hopper → move to the side → wait for launch.
Realistic timeline: Most dogs take 3–7 sessions to drop the ball reliably into the hopper. Some faster, some slower. Consistency of technique matters more than session length.
Phase 3: Transitioning to Independent Play
Once your dog reliably completes the retrieve-and-drop sequence with you present, you can begin stepping back.
Step 5 — Gradually Increase Your Distance from the Machine
Each session, position yourself slightly farther from the launcher than the previous session. Move in small increments — a few feet at a time. Your dog should be completing the full sequence (retrieve → drop-in → wait to the side → launch) reliably before you increase the distance.
If your dog starts skipping steps or dropping the ball in the wrong place when you move farther away, step back to your previous position and consolidate before progressing again.
Realistic timeline: Most dogs transition to reliable independent play within 1–2 weeks of consistent daily sessions.
Step 6 — Reinforce the Side-Position Safety Habit Throughout
Every single session, from the very first to the hundredth, reinforce one non-negotiable rule: after dropping the ball into the hopper, your dog must move to the side of the machine — not stand directly in front of the launch opening.
The machine’s motion sensor provides a layer of protection, but sensors can be triggered by other objects, can malfunction, and are not a substitute for the habit. A ball launched at close range can cause injury.
Teach this with a simple command — “out,” “side,” or “back” — and reward your dog every time they move to the correct position after a drop-in. Make it part of the sequence from day one.
Handling Common Training Problems
If Your Dog Is Scared of the Machine
Fear responses are most common in noise-sensitive dogs and dogs that were startled by an early launch before proper introduction. Do not force interaction — this makes fear worse, not better.
What to do:
– Return to Step 1. Place the machine at the far end of the room and scatter treats at increasing proximity to it over several days.
– Use the highest-value treats you have — real chicken, cheese, or whatever your dog responds to most strongly.
– Move at your dog’s pace entirely. Some noise-sensitive dogs need 1–2 weeks just to get comfortable with the powered-on machine before any ball is launched. This is normal.
– Never comfort your dog excessively when they show fear — calm, matter-of-fact behavior from you is more reassuring than fussing.
If Your Dog Won’t Drop the Ball Into the Hopper
This is the most common training sticking point. The ball ends up on the floor next to the machine, or your dog drops it and immediately looks at you rather than the hopper.
What to do:
– Check that the hopper opening is physically reachable for your dog. Very small breeds may struggle with the height — in this case, you may need to help place the ball for a longer period before self-loading becomes possible.
– Keep the treat positioned directly above the hopper opening, not in front of you. You want your dog’s nose — and therefore the ball drop — aimed at the machine, not at you.
– Use a specific verbal cue consistently every single time. “Drop it,” “bucket,” or any word you choose — but use the same word every time.
– If your dog drops the ball nearby but not in the hopper, do not reward. Wait. Most dogs will nudge the ball or make another attempt. Reward any movement toward the hopper.
If Your Dog Loses Interest Quickly
Short attention span during training is usually a sign of one of three things: sessions are too long, the treats aren’t valuable enough, or the dog has had enough for the day.
What to do:
– Cap all sessions at 10–15 minutes maximum. End every session while your dog is still engaged — stop before they disengage, not after.
– Upgrade your treats. If you’re using dry kibble or standard biscuits, switch to something with higher value: small pieces of real meat, cheese, or a treat your dog only gets during launcher training.
– Accept that some days your dog simply isn’t in the mood. A session that goes poorly is better ended early than pushed through. Come back tomorrow.
Frequently Asked Questions (FAQ)
Q: How long does it take to train a dog to use an automatic ball launcher?
Most dogs grasp the basic retrieve-and-drop sequence within 3–7 training sessions. Reliable independent play — where your dog completes the full loop without guidance — typically takes 1–2 weeks of consistent daily practice. Noise-sensitive dogs or dogs that had a negative early experience with the machine may take longer. There is no fixed timeline; progress at your dog’s pace rather than pushing to a deadline.
Q: Can all dogs learn to use an automatic ball launcher?
Most dogs that already enjoy fetch can learn to use an automatic launcher. The core requirement is that your dog is motivated to chase and retrieve a ball — the training builds on that existing behavior. Dogs that have little interest in fetch are much harder to train for launcher use, as the fundamental drive isn’t there to work with. Age is also a factor: most manufacturers and vets recommend waiting until your dog is at least 12 months old, as younger puppies have developing growth plates that can be stressed by repetitive high-speed sprinting.
Q: My dog keeps standing directly in front of the launcher after dropping the ball. How do I fix this?
This is a safety issue worth addressing immediately. Introduce a specific command — “out,” “side,” or “back” — and use it every single time your dog positions in front of the launch opening after a drop-in. Combine the command with a hand signal pointing to the correct side position, and reward your dog every time they move to the correct spot. Reinforce this habit in every session from the beginning. The launcher’s motion sensor provides some protection, but it is not a substitute for the positional habit.
Q: Should I leave my dog alone with the ball launcher once they’re fully trained?
Most manufacturers advise against unsupervised use, and we agree. Even a well-trained dog can overheat from extended self-play, get an unexpected jam that causes frustration or injury, or develop compulsive behavior around the machine if sessions are unregulated. Supervise all sessions and use the machine’s built-in rest timer if it has one. Independent play is the goal — unsupervised play is a different thing.
Final Note
The drop-in habit is the whole game. Once your dog reliably retrieves the ball and drops it into the hopper without prompting, the rest follows naturally. Invest the most time in Steps 3 and 4, and the transition to independent play in Phase 3 will happen faster than you expect.
Keep sessions short, end on a positive note every time, and let your dog set the pace on the fear-related steps. Patience in the early stages saves significant time later.
More Guides in This Series
- Full comparison across all sizes and budgets → See our complete guide to the [best dog ball launchers of 2026]
- Have a large dog at home too?→ [Best automatic ball launcher for large dogs] — standard tennis balls, longer range, built for bigger breeds
- Have a small dog at home too?→ [Best automatic ball launcher for small dogs] — smaller balls, gentler power, safer for toy breeds
- Launcher not working as expected?→ [How to fix common automatic ball launcher problems] — wet ball jams, sensor faults, and battery issues covered